Solar Company in DFW

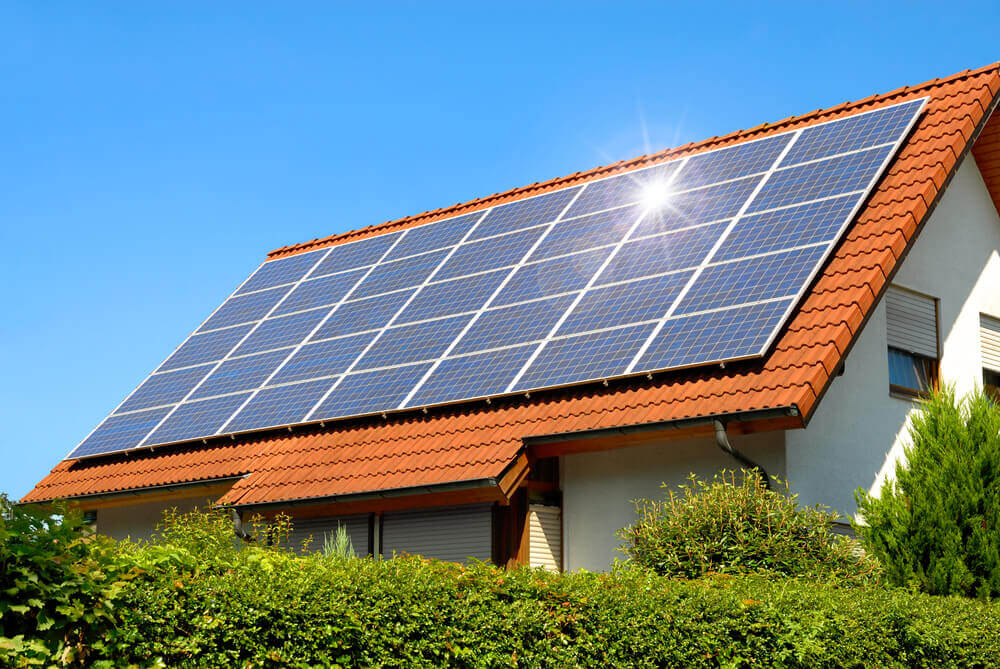
For high of the west, particularly in nations like Australia, France, and Canada, there’s a massive push into the renewable power market that today is driven mainly by solar power. When most people think solar technology, they’ve pictures of these large, unsightly glass panels that are just strewn across fields absorbing sunlight. The actual construction and style of those panels greater level of modern-day now, they could make beautiful, practical addendums to lots of homes.


The true secret for you to get the most effective types of solar panels for your house that actually work the very best and provide you with the best value is to locate quality solar contractor. Though, for many people, they aren’t sure what these contractors do. Generally speaking, a contractor employed in the solar market is your go-to source to take care of your circumstances completely. They are going to will give you quote and consultation that’s specific to your property and location. They’ll walk you through your options and talk you thru what you can expect. And, best of all, they handle investing in the merchandise and ensure that they’re working and doing everything they promised.

Top Important things about a Quality Solar Professional On your side
To help you get to know, listed below are the superior few benefits you will get by selecting a winning contractor.

The feeling You Don’t Have

The actual fact with the matter is you don’t really should check out any specialized school to install solar power systems. You wouldn’t build we have; you’d probably you need to be connecting things and hooking the rigs up per their design. Even still, it’s an extremely complicated and involved job. You don’t only ought to build the panels and ensure they’re angled and moving the right way, however you also need to create it rigs, the converters, and tie it into the home’s primary power outlet/source. This service is exactly what a renewable energy can provide in your case, that you simply cannot handle yourself unless you possess a considerable amount of time and some exposure to this type of work.

A chance to Adjust

Let’s state that you selected, a to z, to buy and install solar panel systems yourself. You receive the panels you believe are correct, and you go to hook them up. However, once you’re midway over the project, you understand you haven’t gotten enough panels to provide you with enough electricity to actually run your home. Or you do most of the work and cannot receive the converter figured out, so your batteries won’t charge. You’ve wasted money and time, and also this all may have been prevented by selecting a qualified contractor. They are able to enable you to get that capacity to adjust and obtain it right.

Customization and value Framing

A very important factor a contractor can present you with that you probably can’t do on your own is framing how big the price tag on a method which will meet your exact specifications. Every rentals are unique, and quite a few people have a different, limited budget. Precisely what a specialist can perform is use you a system providing you with you with everything else that you need for your power needs, while also meeting your budgetary requirements.

System Integrity

How good may be the system doing work for your house? Something a good contractor is going to do is stick around that will help you ensure you’re getting all you can out of the system, meaning that they’re not just planning to tighten a number of screws after which flee you. What they’re likely to do is help calibrate the machine to ensure you’re having the volume of electricity with the conversion that you’re allowed to be getting.

As much as possible told, finding a quality contractor will be the only solution. There are numerous benefits that you’re planning to gain whenever you pick a qualified solar technology contractor in your area. From beginning to end, here is the 6 ways to make sure you get an excellent setup you could afford.
More info about solar installers near me take a look at the best website

How to Become CPR Certified

Becoming certified in cardiopulmonary resuscitation (CPR) is extremely beneficial. CPR saves lives and is simple to learn, and is an easy task to be certified in. Countries that have dedicated heart and health associations (for example the American Heart Association (AHA) and Red Cross) host various sorts of seminars and classes for your convenience. This skill may be essential in certain careers, such as childcare, healthcare, and occupational therapy in fact it is a useful skill to get.

Method 1: Gathering Information About CPR Certification

1. Identify reasons to get certified.


Many reasons exist for to acquire certified in CPR. Some of the most important ones include:
You can save lives – it explains to be familiar with your surroundings and recognize signs of cardiac arrest along with other debilitating situations.
You happen to be better equipped to help you others in need. Research has shown that CPR certified individuals are more prone to assist over time of need.
It appears good with a resume. CPR certification they can be handy in many jobs such as childcare, education, food services, sports coaching, and elder care.
It offers a superior comfort knowing you are to help you others in need.

2. Prepare questions to ask certification providers.
There are many faqs you ought to ask your certification organization to actually are receiving the best this course.

These questions include:
Must i receive a CPR card after completing this class? This signifies that you have ended an authorized course.
Will i get hands-on-training on this class? While you can complete this get more info, it might be far better to practice these skills in the classroom.
Is my instructor certified to show CPR certification? You would like to be sure that your instructor is legally capable of teach the course!

3. Meet age requirements.
Just about everyone is permitted to have a CPR class. If you’re able to pay the course fee capable to perform duties necessary, it is possible to become certified in order to save lives.
Experts recommend that cards might be made available to children as early as 10 years old.

Method 2: Understanding the CAB (Compression, Airway, Breathing) acronym

1. Learn how to do compressions.
This really is designed to restore the circulation of blood. In the CPR course, your trainer will coach you on to effectively do chest compressions on adults and infants.

You will learn:
Put the victim on his back.
Kneel on the victim’s side.
Squeeze heel of your respective hand in the right position about the victim’s chest (involving the nipples). Stack you on the job the surface of the other person. Maintain your elbows straight as well as your shoulders squared and directly above both your hands.
Make use of your chest muscles weight and press straight down. Push hard around 100 compressions each minute.

2. Understand how to clear an airway.
After chest compressions, you ought to discover ways to clear a person’s airway. Generally, you need to do this from the head-tilt, chin-lift maneuver.

To do this:
Gently lift the victim’s forehead with your palm. Then, gently tilt the head back.
Together with your contrary, tilt the chin forward.
Search for normal breathing and look for chest motion.
Begin mouth-to-mouth breathing if the victim is gasping or otherwise breathing normally.

3. Focus on breathing.
In your CPR course, you will see the best way to properly give mouth-to-mouth breathing.

To do this:
As soon as the victim’s airway is obvious (with all the head-tilt, chin-lift maneuver), pinch his nostrils closed.
Cover the victim’s mouth with your own individual to make a seal.
Prepare to give two rescue breaths. Provide a one-second breath and observe to find out if the chest area rises. Whether or not this does, supply the second breath.
In the event the chest doesn’t rise, repeat the airway clearing maneuver (head-tilt and chin lift) and check out again.
After giving rescue breaths, give thirty chest compressions.
Continue CPR movements until there are indications of movement or medical personnel arrive.

4. Put people recovery position.
A recovery position is made to maintain the victim’s airway open. This will likely also ensure that the victim will not likely choke from fluids or vomit.

Within a CPR class, you will see to:
Get upon the ground at the victim.
Place the victim’s arm, usually the one nearest to you personally, at a right angle toward his head.
Tuck the victim’s other arm up toward his head in order that the back of his hand is touching his cheek.
Bend his knee, usually the one furthest by you, in a right angle.
Carefully roll him on his side by pulling his bent knee. At this point, his arm needs to be cushioning his head.
Tilt his head back slightly; this will likely ensure his airway is open.
Keep with the individual and monitor his condition.

Method 3: Passing an accreditation Course

1. Expect the course to have some hours.
Generally speaking, a basic CPR course takes a couple of hours to accomplish. These courses might run longer or shorter with regards to the audience with the class.
For instance, should you be just renewing your CPR certification, it may take less time when compared to a classroom full of new students.

2. Prepare to take an itemized exam, in some instances.
Some certifications, such as the AHA’s BLS course, features a 25 question test you need to get yourself a 84% or maybe more onto pass.
These questions cover the fabric covered in your class including the best way to respond in emergency situations. You’ll be able to please take a pretest about the AHA’s site that might help you prepare.

3. Prepare to take a skills check.
You may be necessary to show that you may perform CPR along with other lifesaving duties.

This will likely include:
Checking patient for response.
Activating emergency response signal.
Opening airway using chin-tilt method.
Checking breathing.
Checking carotid pulse.
Locating CPR hand position.
Delivering appropriate CPR compressions.

4. Make sure to recertify. Certifications generally last around two years. You will need to retake the program to renew.
Expiration dates appear towards the bottom of your CPR certification card.
Check out go to see this useful internet page: bls classes

Сontact info:
Company: CPR Certify4u
Adress: 8546 Palm Pkwy Suite #568, Orlando, FL 32836
Phone: (407) 674-2441

How to Become CPR Certified

Becoming certified in cardiopulmonary resuscitation (CPR) is very beneficial. CPR saves lives which is very easy to learn, which is very easy to be certified in. Countries which may have dedicated heart and health associations (for example the American Heart Association (AHA) and Red Cross) host various sorts of seminars and courses of instruction for your convenience. This skill may be crucial in certain careers, like childcare, healthcare, and occupational therapy and it is a useful skill to have.

Method 1: Gathering Specifics of CPR Certification

1. Identify top reasons to get certified.


Many reasons exist to get certified in CPR. Probably the most important ones include:
It will save you lives – it explains to be familiar with your surroundings and recognize signs of cardiac arrest along with other debilitating situations.
You might be in a better position to help others short of funds. Research has shown that CPR certified folks are more likely to assist soon enough of need.
It seems good over a resume. CPR certification can be handy in several jobs including childcare, education, food services, sports coaching, and elder care.
It gives you reassurance knowing you are ready to help others in need of funds.

2. Prepare questions you should ask certification providers.
There are a few frequently asked questions you should ask your certification organization to make sure you are getting the best the course.

These questions include:
Do I receive a CPR card after completing this class? This demonstrates that you have finished a licensed course.
Will i get hands-on-training within this class? While you can complete this buy online, it may be better to practice these skills inside a classroom.
Is my instructor certified to show CPR certification? You need to ensure that your instructor is legally capable of teach the course!

3. Meet age requirements.
Just about everyone is eligible to please take a CPR class. If you’re able to cover the course fee and capable to do the duties necessary, you’ll be able to become certified in order to save lives.
It is strongly recommended that cards can be given to children who are only Ten years old.

Method 2: Understanding the CAB (Compression, Airway, Breathing) acronym

1. Figure out how to do compressions.
This can be built to restore the flow of blood. In a CPR course, your trainer will educate you on to properly do chest compressions on adults and infants.

Become familiar with:
Put the victim on his back.
Kneel on the victim’s side.
Squeeze heel of the submit the right position about the victim’s chest (between the nipples). Stack you practical top of one another. Keep the elbows straight along with your shoulders squared and directly above both hands.
Make use of your chest weight and press lower. Push hard at about 100 compressions each minute.

2. Learn how to clear an airway.
After chest compressions, you must figure out how to clear a person’s airway. Generally, you need to do this through the head-tilt, chin-lift maneuver.

To get this done:
Gently lift the victim’s forehead using your palm. Then, gently tilt the head back.
Together with your other hand, tilt the chin forward.
Pay attention to normal breathing and look for chest motion.
Begin mouth-to-mouth breathing if the victim is gasping or not breathing normally.

3. Concentrate on breathing.
In your CPR course, you will see how to properly give mouth-to-mouth breathing.

To do this:
Following the victim’s airway is apparent (using the head-tilt, chin-lift maneuver), pinch his nostrils closed.
Cover the victim’s mouth with your own personal to produce a seal.
Prepare to provide two rescue breaths. Provide a one-second breath and watch to find out if stomach rises. Whether it does, provide the second breath.
If your chest doesn’t rise, repeat the airway clearing maneuver (head-tilt and chin lift) and try again.
After giving rescue breaths, give thirty chest compressions.
Continue CPR movements until you can find signs and symptoms of movement or medical personnel arrive.

4. Put people in recovery position.
A recovery position was created to keep the victim’s airway open. This may also be sure that the victim is not going to choke from fluids or vomit.

Inside a CPR class, become familiar with to:
Get down on the ground close to the victim.
Place the victim’s arm, the main one nearest to you, at a right angle toward his head.
Tuck the victim’s other arm up toward his head so your back of his hand is touching his cheek.
Bend his knee, normally the one furthest of your stuff, in a right angle.
Carefully roll him on his side by pulling his bent knee. At this point, his arm needs to be cushioning his head.
Tilt his return slightly; this may ensure his airway is open.
Stick with the person and monitor his condition.

Method 3: Passing an accreditation Course

1. Expect the program to snap hours.
In general, a fundamental CPR course takes two to three hours to finish. These courses might run longer or shorter based on the audience with the class.
By way of example, in case you are just renewing your CPR certification, it could take a shorter time compared to a classroom packed with new students.

2. Prepare to adopt an itemized exam, in some cases.
Some certifications, for example the AHA’s BLS course, includes a 25 question test you need to get yourself a 84% or higher to pass.
These questions cover the pad covered with your class including the way to respond in emergency situations. You’ll be able to have a pretest for the AHA’s website that might help you prepare.

3. Prepare to adopt a skills check.
You’ll be needed to show that it is possible to perform CPR along with other lifesaving duties.

This will likely include:
Checking patient for response.
Activating emergency response signal.
Opening airway using chin-tilt method.
Checking breathing.
Checking carotid pulse.
Locating CPR hand position.
Delivering appropriate CPR compressions.

4. Be sure you recertify. Certifications generally last a couple of years. You will have to retake the program to renew.
Expiration dates appear at the end of your CPR certification card.
For additional information just go to our web site: check this website out

Сontact info:
Company: CPR Certify4u
Adress: 8546 Palm Pkwy Suite #568, Orlando, FL 32836
Phone: (407) 674-2441

How to Become CPR Certified

Becoming certified in cardiopulmonary resuscitation (CPR) is incredibly beneficial. CPR saves lives and it is very easy to learn, and is also easy to be certified in. Countries which have dedicated heart and health associations (including the American Heart Association (AHA) and Red Cross) host various sorts of seminars and courses of instruction for your convenience. This skill could possibly be essential in certain careers, including childcare, healthcare, and occupational therapy in fact it is a useful skill to have.

Method 1: Gathering Specifics of CPR Certification

1. Identify why you should get certified.


A lot of to obtain certified in CPR. Some of the most important ones include:
You can save lives – it shows you to understand your surroundings and recognize signs of stroke and other debilitating situations.
You happen to be better equipped to assist others in need of assistance. Research indicates that CPR certified people are prone to lend a hand in time of need.
It appears good over a resume. CPR certification are needed in a lot of jobs including childcare, education, food services, sports coaching, and elder care.
It gives you reassurance knowing you are to help others in need of funds.

2. Prepare questions you should ask certification providers.
There are some common questions you ought to ask your certification organization to ensure that you are receiving the best from the course.

These questions include:
Should i be given a CPR card after completing these types? This implies that you have ended a certified course.
Must i get hands-on-training on this class? When you can complete this florida, it will be advisable to practice these skills in a classroom.
Is my instructor certified to show CPR certification? You need to be sure that your instructor is legally capable to teach the class!

3. Meet age requirements.
Everyone is eligible to require a CPR class. If you’re able to pay the course fee and able to do the duties necessary, you can become certified to avoid wasting lives.
It is suggested that cards might be given to children as young as Decade old.

Method 2: Understanding the CAB (Compression, Airway, Breathing) acronym

1. Figure out how to do compressions.
This is meant to restore blood circulation. In a CPR course, your trainer will teach you to properly do chest compressions on adults and infants.

You will learn:
Squeeze victim on his back.
Kneel with the victim’s side.
Position the heel of the return the right position about the victim’s chest (involving the nipples). Stack you face to face the surface of the other person. Maintain your elbows straight along with your shoulders squared and directly above both hands.
Takes place chest muscles weight and press along. Push hard at about 100 compressions per minute.

2. Discover how to clear an airway.
After chest compressions, you should figure out how to clear a person’s airway. Generally, you do this by the head-tilt, chin-lift maneuver.

To accomplish this:
Gently lift the victim’s forehead along with your palm. Then, gently tilt your head back.
Along with your flip side, tilt the chin forward.
Look for normal breathing to see chest motion.
Begin mouth-to-mouth breathing in the event the victim is gasping you aren’t breathing normally.

3. Concentrate on breathing.
Within your CPR course, become familiar with the way to properly give mouth-to-mouth breathing.

To get this done:
As soon as the victim’s airway is apparent (while using head-tilt, chin-lift maneuver), pinch his nostrils closed.
Cover the victim’s mouth with your own personal to produce a seal.
Prepare to present two rescue breaths. Provide a one-second breath and watch to determine if the chest area rises. If it does, provide second breath.
If the chest doesn’t rise, repeat the airway clearing maneuver (head-tilt and chin lift) and check out again.
After giving rescue breaths, give thirty chest compressions.
Continue CPR movements until there are indications of movement or medical personnel arrive.

4. Put people recovery position.
A recovery position is made to keep your victim’s airway open. This can also make sure that the victim will not choke from fluids or vomit.

In a CPR class, you will see to:
Get documented on the ground near the victim.
Put the victim’s arm, normally the one nearest for you, in a right angle toward his head.
Tuck the victim’s other arm up toward his head so the back of his hand is touching his cheek.
Bend his knee, usually the one furthest from you, in the right angle.
Carefully roll him on his side by pulling his bent knee. At this point, his arm needs to be cushioning his head.
Tilt his return slightly; this may ensure his airway is open.
Stick with the person and monitor his condition.

Method 3: Passing a Certification Course

1. Expect the program to snap hours.
In general, a fundamental CPR course takes two to three hours to accomplish. These courses might run longer or shorter with respect to the audience with the class.
By way of example, if you are just renewing your CPR certification, it may take less time than the usual classroom full of new students.

2. Prepare to take a written exam, sometimes.
Some certifications, like the AHA’s BLS course, carries a 25 question test you need to get a 84% or maybe more onto pass.
These questions cover the information covered within your class including the way to respond in emergency situations. You’ll be able to please take a pretest around the AHA’s website that might help you prepare.

3. Prepare to take a skills check.
You will end up necessary to show that it is possible to perform CPR as well as other lifesaving duties.

This might include:
Checking patient for response.
Activating emergency response signal.
Opening airway using chin-tilt method.
Checking breathing.
Checking carotid pulse.
Locating CPR hand position.
Delivering appropriate CPR compressions.

4. Be sure you recertify. Certifications generally last a couple of years. You simply must retake this course to renew.
Expiration dates appear towards the bottom of your respective CPR certification card.
More details go to the best site: website

Сontact info:
Company: CPR Certify4u
Adress: 8546 Palm Pkwy Suite #568, Orlando, FL 32836
Phone: (407) 674-2441

How to Become CPR Certified

Becoming certified in cardiopulmonary resuscitation (CPR) is very beneficial. CPR saves lives and is also very easy to learn, and is also easy to be certified in. Countries that have dedicated heart and health associations (for example the American Heart Association (AHA) and Red Cross) host different styles of seminars and courses of instruction for your convenience. This skill may be crucial in certain careers, including childcare, healthcare, and occupational therapy which is a useful skill to have.

Method 1: Gathering Details about CPR Certification

1. Identify top reasons to get certified.


Many reasons exist for to get certified in CPR. Some of the most important ones include:
You can save lives – it shows you to know your surroundings and recognize warning signs of cardiac event and other debilitating situations.
You’re in a better position to help others short of funds. Research indicates that CPR certified individuals are very likely to assist in time of need.
It looks good on the resume. CPR certification are needed in a number of jobs like childcare, education, food services, sports coaching, and elder care.
It offers a superior peace of mind knowing you are prepared to help others in need.

2. Prepare questions you should ask certification providers.
There are several faq’s you must ask your certification organization to successfully are becoming the most from the program.

These questions include:
Must i receive a CPR card after completing these kinds? This signifies that you have ended a certified course.
Will i get hands-on-training on this class? When you can complete this call me, it might be best to practice these skills in a classroom.
Is my instructor certified to instruct CPR certification? You would like to be sure that your instructor is legally capable of teach the course!

3. Meet age requirements.
Almost everyone is eligible to please take a CPR class. If you are able to spend the course fee and capable to perform duties necessary, you’ll be able to become certified in order to save lives.
It’s advocated that cards can be presented to children as little as A decade old.

Method 2: Learning the CAB (Compression, Airway, Breathing) acronym

1. Figure out how to do compressions.
This really is made to restore blood flow. In the CPR course, your trainer will teach you to properly do chest compressions on adults and infants.

You will understand:
Position the victim on his back.
Kneel on the victim’s side.
Squeeze heel of your hand in the correct position on the victim’s chest (between your nipples). Stack you hands on top of the other person. Maintain elbows straight plus your shoulders squared and directly above the hands.
Make use of chest muscles weight and press along. Push hard around 100 compressions per minute.

2. Discover how to clear an airway.
After chest compressions, you ought to learn how to clear a person’s airway. Generally, you need to do this with the head-tilt, chin-lift maneuver.

To do this:
Gently lift the victim’s forehead using your palm. Then, gently tilt the head back.
Together with your contrary, tilt the chin forward.
Look for normal breathing to see chest motion.
Begin mouth-to-mouth breathing when the victim is gasping or otherwise not breathing normally.

3. Give attention to breathing.
With your CPR course, you will see how to properly give mouth-to-mouth breathing.

To get this done:
After the victim’s airway is see-through (while using head-tilt, chin-lift maneuver), pinch his nostrils closed.
Cover the victim’s mouth with your own personal to generate a seal.
Prepare to offer two rescue breaths. Offer a one-second breath and observe to ascertain if tummy rises. Whether it does, provide the second breath.
When the chest doesn’t rise, repeat the airway clearing maneuver (head-tilt and chin lift) and try again.
After giving rescue breaths, give thirty chest compressions.
Continue CPR movements until there are indications of movement or medical personnel arrive.

4. Put individuals recovery position.
A recovery position was created to maintain your victim’s airway open. This will also make certain that victim is not going to choke from fluids or vomit.

In the CPR class, you will understand to:
Get recorded on the ground nearby the victim.
Put the victim’s arm, normally the one nearest to you personally, at a right angle toward his head.
Tuck the victim’s other arm up toward his head so the back of his hand is touching his cheek.
Bend his knee, normally the one furthest of your stuff, in the right angle.
Carefully roll him on his side by pulling his bent knee. At this point, his arm needs to be cushioning his head.
Tilt his return slightly; this will ensure his airway is open.
Stick to anyone and monitor his condition.

Method 3: Passing a Certification Course

1. Expect this course to take a few hours.
Generally speaking, a simple CPR course takes around three hours to finish. These courses might run longer or shorter depending on the audience from the class.
By way of example, in case you are just renewing your CPR certification, it could take a shorter period than a classroom full of new students.

2. Prepare to adopt an itemized exam, sometimes.
Some certifications, for example the AHA’s BLS course, features a 25 question test that you need to get yourself a 84% or more on to pass.
These questions cover the information covered with your class including how to respond in emergency situations. You’ll be able to take a pretest for the AHA’s website that may help you prepare.

3. Prepare to look at a skills check.
You may be required to demonstrate that you’ll be able to perform CPR along with other lifesaving duties.

This may include:
Checking patient for response.
Activating emergency response signal.
Opening airway using chin-tilt method.
Checking breathing.
Checking carotid pulse.
Locating CPR hand position.
Delivering appropriate CPR compressions.

4. Make sure you recertify. Certifications generally last around two years. You need to retake the program to renew.
Expiration dates appear in the bottom of your respective CPR certification card.
Check out visit this popular web site: orlando

Сontact info:
Company: CPR Certify4u
Adress: 8546 Palm Pkwy Suite #568, Orlando, FL 32836
Phone: (407) 674-2441

How to Become CPR Certified

Becoming certified in cardiopulmonary resuscitation (CPR) is incredibly beneficial. CPR saves lives and it is an easy task to learn, and is also easy to be certified in. Countries which have dedicated heart and health associations (like the American Heart Association (AHA) and Red Cross) host many different types of seminars and courses of instruction for your convenience. This skill could possibly be crucial in certain careers, like childcare, healthcare, and occupational therapy in fact it is a useful skill to possess.

Method 1: Gathering Details about CPR Certification

1. Identify top reasons to get certified.


Many reasons exist for to have certified in CPR. Some of the most important ones include:
You save lives – it teaches you to know your surroundings and recognize signs of stroke as well as other debilitating situations.
You happen to be in a better position to help others short of funds. Studies show that CPR certified everyone is more likely to lend a hand in time of need.
It’s good over a resume. CPR certification can be handy in several jobs such as childcare, education, food services, sports coaching, and elder care.
It offers a superior peace of mind knowing you are to assist others in need.

2. Prepare things to ask certification providers.
There are some faqs you must ask your certification organization to ensure that you are becoming the best from this course.

These questions include:
Will i be given a CPR card after completing these types? This shows that you have finished a certified course.
Must i get hands-on-training in this class? As you can complete this CPR Certify4u, it could be far better to practice these skills within a classroom.
Is my instructor certified to train CPR certification? You would like to make sure your instructor is legally capable of teach the class!

3. Meet age requirements.
Everyone is eligible to take a CPR class. If you are able to pay the course fee and capable to perform duties necessary, you are able to become certified to save lives.
It is strongly recommended that cards might be made available to children who are only Ten years old.

Method 2: Understanding the CAB (Compression, Airway, Breathing) acronym

1. Learn to do compressions.
That is designed to restore blood flow. In a CPR course, your trainer will show you to properly do chest compressions on adults and infants.

You will see:
Position the victim on his back.
Kneel in the victim’s side.
Position the heel of one’s hand in the correct position about the victim’s chest (relating to the nipples). Stack you practical top of one another. Keep your elbows straight as well as your shoulders squared and directly above your hands.
Use your chest weight and press lower. Push hard around 100 compressions for each minute.

2. Learn how to clear an airway.
After chest compressions, you should figure out how to clear a person’s airway. Generally, you need to do this from the head-tilt, chin-lift maneuver.

To accomplish this:
Gently lift the victim’s forehead together with your palm. Then, gently tilt the pinnacle back.
Together with your other hand, tilt the chin forward.
Check for normal breathing to see chest motion.
Begin mouth-to-mouth breathing when the victim is gasping you aren’t breathing normally.

3. Give attention to breathing.
In your CPR course, you will see how to properly give mouth-to-mouth breathing.

To accomplish this:
Following your victim’s airway is see-through (while using the head-tilt, chin-lift maneuver), pinch his nostrils closed.
Cover the victim’s mouth with your personal to generate a seal.
Prepare to present two rescue breaths. Provide a one-second breath and view to see if stomach rises. When it does, give the second breath.
When the chest doesn’t rise, repeat the airway clearing maneuver (head-tilt and chin lift) and try again.
After giving rescue breaths, give thirty chest compressions.
Continue CPR movements until you can find signs of movement or medical personnel arrive.

4. Put people recovery position.
A recovery position was designed to maintain the victim’s airway open. This will also make certain that victim will not choke from fluids or vomit.

In a CPR class, you will see to:
Get down on the ground close to the victim.
Squeeze victim’s arm, the one nearest to you, with a right angle toward his head.
Tuck the victim’s other arm up toward his head so your back of his hand is touching his cheek.
Bend his knee, the main one furthest within you, in the right angle.
Carefully roll him on his side by pulling his bent knee. Now, his arm ought to be cushioning his head.
Tilt his head back slightly; this may ensure his airway is open.
Stick with anybody and monitor his condition.

Method 3: Passing an accreditation Course

1. Expect the course to take a few hours.
In general, a simple CPR course takes a couple of hours to accomplish. These courses might run longer or shorter with respect to the audience in the class.
By way of example, in case you are just renewing your CPR certification, it might take much less time than the usual classroom filled with new students.

2. Prepare to consider an itemized exam, occasionally.
Some certifications, such as the AHA’s BLS course, includes a 25 question test you have to get yourself a 84% or higher on to pass.
These questions cover the information covered inside your class including how to respond in emergencies. You are able to please take a pretest about the AHA’s site that can assist you prepare.

3. Prepare to adopt a skills check.
You will end up necessary to show that you’ll be able to perform CPR along with other lifesaving duties.

This might include:
Checking patient for response.
Activating emergency response signal.
Opening airway using chin-tilt method.
Checking breathing.
Checking carotid pulse.
Locating CPR hand position.
Delivering appropriate CPR compressions.

4. Make sure you recertify. Certifications generally last about 2 years. You simply must retake the course to resume.
Expiration dates appear towards the bottom of one’s CPR certification card.
For more details go this useful internet page: click here

Сontact info:
Company: CPR Certify4u
Adress: 8546 Palm Pkwy Suite #568, Orlando, FL 32836
Phone: (407) 674-2441

How to Become CPR Certified

Becoming certified in cardiopulmonary resuscitation (CPR) is extremely beneficial. CPR saves lives which is easy to learn, which is an easy task to be certified in. Countries which may have dedicated heart and health associations (including the American Heart Association (AHA) and Red Cross) host various sorts of seminars and classes for your convenience. This skill could be essential in certain careers, like childcare, healthcare, and occupational therapy and it’s also a useful skill to possess.

Method 1: Gathering Information About CPR Certification

1. Identify reasons to get certified.


Many reasons exist to have certified in CPR. Probably the most important ones include:
You can save lives – it teaches you to know your surroundings and recognize warning signs of cardiac arrest and also other debilitating situations.
You’re in a better position to help you others in need of assistance. Research has shown that CPR certified individuals are more prone to lend a hand over time of need.
It looks good on a resume. CPR certification are needed in a lot of jobs such as childcare, education, food services, sports coaching, and elder care.
It gives you comfort knowing you are ready to aid others in need of assistance.

2. Prepare questions to ask certification providers.
There are a few faq’s you must ask your certification organization to successfully are getting the most from the course.

These questions include:
Do I obtain a CPR card after completing these types? This signifies that you have finished an authorized course.
Should i get hands-on-training within this class? While you can complete this certification price, it may be far better to practice these skills in a classroom.
Is my instructor certified to instruct CPR certification? You would like to make sure your instructor is legally in a position to teach the course!

3. Meet age requirements.
Everyone is qualified for have a CPR class. If you’re able to pay the course fee and capable to perform duties necessary, you are able to become certified to save lives.
It is strongly recommended that cards can be provided to children as little as 10 years old.

Method 2: Understanding the CAB (Compression, Airway, Breathing) acronym

1. Learn to do compressions.
This can be designed to restore the circulation of blood. Inside a CPR course, your trainer will educate you on to effectively do chest compressions on adults and infants.

You will see:
Place the victim on his back.
Kneel with the victim’s side.
Position the heel of your return the correct position on the victim’s chest (involving the nipples). Stack you on the job the surface of one another. Maintain elbows straight along with your shoulders squared and directly above both your hands.
Make use of chest muscles weight and press all the way down. Push hard at about 100 compressions per minute.

2. Realize how to clear an airway.
After chest compressions, you need to figure out how to clear a person’s airway. Generally, you are doing this through the head-tilt, chin-lift maneuver.

To do this:
Gently lift the victim’s forehead using your palm. Then, gently tilt the top back.
With your other hand, tilt the chin forward.
Search for normal breathing to see chest motion.
Begin mouth-to-mouth breathing when the victim is gasping or otherwise breathing normally.

3. Give attention to breathing.
In your CPR course, become familiar with how you can properly give mouth-to-mouth breathing.

To get this done:
Following your victim’s airway is clear (while using the head-tilt, chin-lift maneuver), pinch his nostrils closed.
Cover the victim’s mouth with your personal to produce a seal.
Prepare to present two rescue breaths. Provide a one-second breath and observe to find out if tummy rises. When it does, give the second breath.
In the event the chest doesn’t rise, repeat the airway clearing maneuver (head-tilt and chin lift) and check again.
After giving rescue breaths, give thirty chest compressions.
Continue CPR movements until you can find signs and symptoms of movement or medical personnel arrive.

4. Put people in recovery position.
A recovery position was created to keep the victim’s airway open. This will likely also make certain that victim is not going to choke from fluids or vomit.

In the CPR class, you will learn to:
Get upon the ground close to the victim.
Position the victim’s arm, usually the one nearest for you, at a right angle toward his head.
Tuck the victim’s other arm up toward his head so that the back of his hand is touching his cheek.
Bend his knee, the main one furthest within you, in a right angle.
Carefully roll him on his side by pulling his bent knee. Now, his arm should be cushioning his head.
Tilt his head back slightly; this will ensure his airway is open.
Stay with anybody and monitor his condition.

Method 3: Passing an accreditation Course

1. Expect this course to take a few hours.
Generally speaking, an elementary CPR course takes two to three hours to perform. These courses might run longer or shorter with regards to the audience in the class.
By way of example, should you be just renewing your CPR certification, it may take much less time compared to a classroom full of new students.

2. Prepare to take a written exam, sometimes.
Some certifications, for example the AHA’s BLS course, has a 25 question test that you must obtain a 84% or higher on pass.
These questions cover the fabric covered with your class including the way to respond in emergencies. It is possible to require a pretest around the AHA’s site that can assist you prepare.

3. Prepare to look at a skills check.
You will be required to show you may perform CPR as well as other lifesaving duties.

This might include:
Checking patient for response.
Activating emergency response signal.
Opening airway using chin-tilt method.
Checking breathing.
Checking carotid pulse.
Locating CPR hand position.
Delivering appropriate CPR compressions.

4. Make sure you recertify. Certifications generally last a couple of years. You will need to retake the program to renew.
Expiration dates appear at the bottom of one’s CPR certification card.
For more info check out this popular site: certification price

Сontact info:
Company: CPR Certify4u
Adress: 8546 Palm Pkwy Suite #568, Orlando, FL 32836
Phone: (407) 674-2441

How to Become CPR Certified

Becoming certified in cardiopulmonary resuscitation (CPR) is incredibly beneficial. CPR saves lives which is very easy to learn, and it is simple to be certified in. Countries which may have dedicated heart and health associations (such as the American Heart Association (AHA) and Red Cross) host different styles of seminars and courses of instruction for your convenience. This skill could be crucial in certain careers, including childcare, healthcare, and occupational therapy which is a beneficial skill to possess.

Method 1: Gathering Specifics of CPR Certification

1. Identify top reasons to get certified.


Many reasons exist for to obtain certified in CPR. One of the most important ones include:
It can save you lives – it shows you to be aware of your surroundings and recognize warning signs of stroke as well as other debilitating situations.
You’re in a better position to help others in need. Studies show that CPR certified people are more prone to lend a hand in time of need.
It seems good on the resume. CPR certification are needed in a lot of jobs including childcare, education, food services, sports coaching, and elder care.
It gives you comfort knowing you are ready to assist others in need of assistance.

2. Prepare things to ask certification providers.
There are some common questions you must ask your certification organization to successfully are getting the most out of this course.

These questions include:
Will i get a CPR card after completing this class? This shows that you have ended a licensed course.
Will i get hands-on-training in this class? Whilst you can complete this link, it could be best to practice these skills inside a classroom.
Is my instructor certified to train CPR certification? You need to ensure that your instructor is legally able to teach the course!

3. Meet age requirements.
Everyone is permitted to please take a CPR class. If you’re able to pay this course fee capable to perform duties necessary, it is possible to become certified to save lives.
It is strongly recommended that cards might be provided to children as early as A decade old.

Method 2: Understanding the CAB (Compression, Airway, Breathing) acronym

1. Learn to do compressions.
This is made to restore blood flow. Within a CPR course, your trainer will coach you on to do chest compressions on adults and infants.

You will understand:
Squeeze victim on his back.
Kneel with the victim’s side.
Put the heel of your turn in the proper position around the victim’s chest (between the nipples). Stack you face to face the top of the other person. Maintain your elbows straight plus your shoulders squared and directly above the hands.
Make use of chest weight and press lower. Push hard around 100 compressions each and every minute.

2. Discover how to clear an airway.
After chest compressions, you ought to learn to clear a person’s airway. Generally, you do this through the head-tilt, chin-lift maneuver.

To accomplish this:
Gently lift the victim’s forehead along with your palm. Then, gently tilt the top back.
Along with your opposite, tilt the chin forward.
Pay attention to normal breathing and check out chest motion.
Begin mouth-to-mouth breathing in the event the victim is gasping or otherwise breathing normally.

3. Target breathing.
In your CPR course, you will see the way to properly give mouth-to-mouth breathing.

To accomplish this:
Following the victim’s airway is see-through (while using head-tilt, chin-lift maneuver), pinch his nostrils closed.
Cover the victim’s mouth with your personal to produce a seal.
Prepare to give two rescue breaths. Give a one-second breath and watch to determine if tummy rises. If it does, provide the second breath.
When the chest doesn’t rise, repeat the airway clearing maneuver (head-tilt and chin lift) and attempt again.
After giving rescue breaths, give thirty chest compressions.
Continue CPR movements until there are indications of movement or medical personnel arrive.

4. Put people recovery position.
A recovery position was created to keep your victim’s airway open. This will also be sure that the victim won’t choke from fluids or vomit.

In the CPR class, become familiar with to:
Get recorded on the bottom near the victim.
Squeeze victim’s arm, normally the one nearest for you, at a right angle toward his head.
Tuck the victim’s other arm up toward his head in order that the back of his hand is touching his cheek.
Bend his knee, the one furthest by you, inside a right angle.
Carefully roll him on his side by pulling his bent knee. At this point, his arm should be cushioning his head.
Tilt his head back slightly; this can ensure his airway is open.
Stay with anybody and monitor his condition.

Method 3: Passing an accreditation Course

1. Expect the program to snap hours.
Generally, a fundamental CPR course takes three hours to perform. These courses might run longer or shorter with respect to the audience in the class.
For instance, if you’re just renewing your CPR certification, it might take a shorter time compared to a classroom brimming with new students.

2. Prepare to adopt an itemized exam, sometimes.
Some certifications, for example the AHA’s BLS course, has a 25 question test you have to have a 84% or higher on pass.
These questions cover the information covered inside your class including how you can respond in emergency situations. It is possible to take a pretest for the AHA’s site that may help you prepare.

3. Prepare to look at a skills check.
You may be necessary to show that you’ll be able to perform CPR as well as other lifesaving duties.

This will likely include:
Checking patient for response.
Activating emergency response signal.
Opening airway using chin-tilt method.
Checking breathing.
Checking carotid pulse.
Locating CPR hand position.
Delivering appropriate CPR compressions.

4. Make sure to recertify. Certifications generally last about 2 years. You will need to retake this course to renew.
Expiration dates appear at the bottom of the CPR certification card.
More information go to this useful web site: click here

Сontact info:
Company: CPR Certify4u
Adress: 8546 Palm Pkwy Suite #568, Orlando, FL 32836
Phone: (407) 674-2441

How to Become CPR Certified

Becoming certified in cardiopulmonary resuscitation (CPR) is very beneficial. CPR saves lives which is an easy task to learn, which is simple to be certified in. Countries which may have dedicated heart and health associations (like the American Heart Association (AHA) and Red Cross) host variations of seminars and classes for your convenience. This skill may be crucial in certain careers, like childcare, healthcare, and occupational therapy and it’s also a beneficial skill to own.

Method 1: Gathering Details about CPR Certification

1. Identify good reasons to get certified.


A lot of to acquire certified in CPR. Probably the most important ones include:
It can save you lives – it shows you to be familiar with your surroundings and recognize signs of cardiac event and other debilitating situations.
You happen to be better equipped to aid others in need of funds. Research indicates that CPR certified everyone is very likely to lend a hand soon enough of need.
It seems good on the resume. CPR certification are needed in many jobs for example childcare, education, food services, sports coaching, and elder care.
It offers a superior reassurance knowing you’re to help others short of funds.

2. Prepare things to ask certification providers.
There are several faq’s you need to ask your certification organization to ensure that you increasingly becoming the most from this course.

These questions include:
Will i obtain a CPR card after completing these types? This demonstrates that you have completed a professional course.
Must i get hands-on-training with this class? While you can complete this infant website, it might be far better to practice these skills inside a classroom.
Is my instructor certified to teach CPR certification? You need to ensure that your instructor is legally able to teach the course!

3. Meet age requirements.
Just about everyone is permitted to please take a CPR class. If you’re able to cover the course fee and capable to carry out the duties necessary, you’ll be able to become certified to avoid wasting lives.
It is strongly recommended that cards may be presented to children as young as A decade old.

Method 2: Understanding the CAB (Compression, Airway, Breathing) acronym

1. Figure out how to do compressions.
That is designed to restore blood flow. In the CPR course, your trainer will educate you on to do chest compressions on adults and infants.

Become familiar with:
Position the victim on his back.
Kneel in the victim’s side.
Place the heel of the return the proper position for the victim’s chest (between your nipples). Stack you hands on surface of one other. Maintain elbows straight plus your shoulders squared and directly above your hands.
Make use of your chest weight and press all the way down. Push hard around 100 compressions each and every minute.

2. Learn how to clear an airway.
After chest compressions, you need to learn to clear a person’s airway. Generally, you are doing this through the head-tilt, chin-lift maneuver.

To achieve this:
Gently lift the victim’s forehead along with your palm. Then, gently tilt the top back.
Using your other hand, tilt the chin forward.
Pay attention to normal breathing to see chest motion.
Begin mouth-to-mouth breathing in the event the victim is gasping you aren’t breathing normally.

3. Target breathing.
In your CPR course, you will see the way to properly give mouth-to-mouth breathing.

To achieve this:
As soon as the victim’s airway is apparent (while using the head-tilt, chin-lift maneuver), pinch his nostrils closed.
Cover the victim’s mouth with your own individual to generate a seal.
Prepare to provide two rescue breaths. Give a one-second breath watching to ascertain if the chest area rises. Whether it does, provide the second breath.
If your chest doesn’t rise, repeat the airway clearing maneuver (head-tilt and chin lift) and check out again.
After giving rescue breaths, give thirty chest compressions.
Continue CPR movements until there are warning signs of movement or medical personnel arrive.

4. Put folks recovery position.
A recovery position was designed to maintain the victim’s airway open. This can also make sure that the victim is not going to choke from fluids or vomit.

In the CPR class, you will see to:
Get down on the floor nearby the victim.
Squeeze victim’s arm, usually the one nearest to you personally, in a right angle toward his head.
Tuck the victim’s other arm up toward his head so that the back of his hand is touching his cheek.
Bend his knee, the one furthest within you, within a right angle.
Carefully roll him on his side by pulling his bent knee. At this time, his arm needs to be cushioning his head.
Tilt his head back slightly; this will likely ensure his airway is open.
Keep with anyone and monitor his condition.

Method 3: Passing a Certification Course

1. Expect this course to have some hours.
Generally speaking, an elementary CPR course takes a couple of hours to finish. These courses might run longer or shorter with respect to the audience in the class.
For instance, if you are just renewing your CPR certification, it may take much less time compared to a classroom packed with new students.

2. Prepare to take an itemized exam, occasionally.
Some certifications, like the AHA’s BLS course, includes a 25 question test you have to obtain a 84% or older on to pass.
These questions cover the pad covered with your class including how to respond in emergencies. You’ll be able to please take a pretest around the AHA’s website that may help you prepare.

3. Prepare to take a skills check.
You’ll be required to show that you’ll be able to perform CPR along with other lifesaving duties.

This will likely include:
Checking patient for response.
Activating emergency response signal.
Opening airway using chin-tilt method.
Checking breathing.
Checking carotid pulse.
Locating CPR hand position.
Delivering appropriate CPR compressions.

4. Make sure to recertify. Certifications generally last a couple of years. You will need to retake this course to renew.
Expiration dates appear at the bottom of your CPR certification card.
To read more take a look at the best internet page: CPR Certify4u – Orlando

Сontact info:
Company: CPR Certify4u
Adress: 8546 Palm Pkwy Suite #568, Orlando, FL 32836
Phone: (407) 674-2441

Facts You Have To Be Informed On Pizza

Just hearing the saying “Pizza” brings a major smile to faces. It doesn’t matter if you’re a fan of thin crust, pan crust or deep dish – nothing is as delicious as pizza. This take out is easily accessible and it is an international delight. Purchase pizza online, buy it frozen or help it become accustomed to few ingredients. Here are several fun pizza details about your favourite dish.

They’ll allow you to fall in love with pizza yet again, construct your appetite and acquire you longing for one after their list. Let’s wait and watch the amount of interesting facts about pizza will surprise you.

The very first Pizza
If we think of pizza, we believe of Italiano, in fact, the original source of pizza emanates from middle ages times when Greeks and Egyptians were cooking pizza like flatbreads topped with olives and spices.

The pizza then evolved in Naples, Italy, if it was topped with tomatoes inside the 1700s. The pizza crust has a technical term called “cornicione”.

The priciest Pizza
Italy has got the priciest pizza, which can be priced at $12,000. This is simply not a typical pizza since the dough is done perfectly by the chef in your home kitchen. Yes, you read that right. The chef comes to your kitchen and helps to make the pizza fresh at your residence. Some of the ingredients include three types of caviar, lobster, Cilento mountain oregano, mozzarella cheese and grains of pink Australian sea salt in the Murray River.

October Is National Pizza Month
The publisher of Pizza Today magazine created National Pizza Month in October of 1984. Now it is celebrated every year. Most likely the proven fact that Halloween is one of the busiest times of the pizza year helped to create October National pizza month.

World’s Largest Pizza
The world’s largest pizza recorded was made by Dovilion Nardi, Matteo Giannotte Andrea Mannocchi, Matteo Nardi, and Marco Nardi in Rome, Italy, around 2012. The counter area of the pizza would be a whopping 13,580 square feet!

Where Did The Name Margherita Pizza Originate from?
The name Margherita pizza was delivered its name from Queen Margherita of Savoy in 1889 when she asked the chef to generate a pizza version on her behalf with toppings of mozzarella, tomatoes and basil.

Pepperoni Is easily the most Popular US Pizza Topping
Pepperoni’s popularity isn’t topping tale! This flavourful, meaty topping is a fan favourite for the right reasons. Be it the slightly smoky flavour or zesty heat that will it for you, Americans’ annual consumption reaches over 251 million pounds.

Pizza Museum
Philadelphia carries a pizza museum called ‘Pizza Brain’, the place to find the world’s largest collection of pizza memorabilia. The museum has different varieties of pizzas from different elements of the entire world. Guinness World Book of Records certified the range next year as “the world’s largest collection of pizza-related items”.

The 1st American Cities To begin Selling Pizza
Chicago, The big apple, Philadelphia and Trenton had large populations of Southern Italian immigrants across the century.

Once they found its way to the USA, they brought their passion for pizza together.

And those are 13 interesting details about pizza that you can not have access to known. Do you feel hungry yet? Sorry (not sorry)!
To learn more about where pizza invented view the best web portal